<%@ Page Language="vb" %>
Create Email message
Create Email Messages and Use Message
Templates
Click on any topic below to go directly to that section in
this tutorial.
Touchscreen Note
.
Where instructions are to select or click, touchscreen device users would
press or tap as appropriate for your device.
CTI Navigator Web II includes a webmail component for sending
outgoing email
messages.
-
To email just a message (without reports or documents from the MLS server),
select "New Message" either in the Links section of the Home Page, or under Tools
in Navigator's menu-bar at the top of all screens. Creating and Sending a new message is
the topic of this tutorial.
-
To email a
message with MLS reports, photos, documents, links and/or maps
for selected listings from the MLS server, open Summary or Details
search results screen, select one or more listings, and then select "E-mail" under the
Options button. For instructions on Emailing MLS
Reports and Documents,
click here
to see the separate tutorial.
Messages can be typed from scratch, or you can use one of
the many pre-written message templates built into CTI Navigator. You can enter
recipient's email addresses, or insert saved client or MLS member addresses from
Navigator's Address Book. Your message can include an attachment from your
computer, or a link to a file on the Internet.
(See the separate tutorial for instructions on using the
Email
Address Book
.)
▲ Return to
Table of Contents ▲
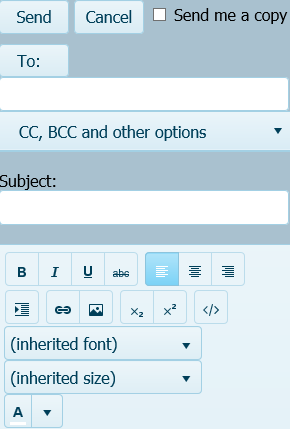
Full Screen
Narrow Screen
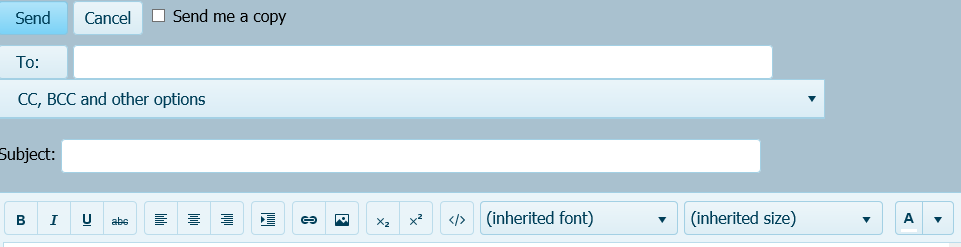
To create a New Email Message in CTI Navigator Web II:
-
Click on "New Message" in the Links on the
Home Page or under Tools in Navigator's menu-bar at the top of the
screen.
-
Check "Send me a Copy" at the top of
the New Message screen if desired.
-
Warning: The MLS does not store any email
messages. If you wish to be able to access messages that you send from
Navigator Web, always send yourself a copy.
-
"Send me a copy" delivers a copy of the message
to the current email address in your agent record in the MLS.
-
To send yourself a copy to a different address
than in the MLS, you can enter that address in the BCC address box.
-
Optional:
If you want to copy your message to someone
other than the main recipient(s), attach a file, and/or insert a
pre-written
message template,
click on the "CC, BCC and other options" button.
-
Enter Recipient's email address(es) in the
appropriate TO, Copy (CC) or Blind Copy (BCC) box.
-
Enter complete addresses. (Addresses do not auto-complete as your type.)
-
To send to multiple recipients, type a
semi-colon between email
addresses (recipient1address;recipient2address
;
...).
-
If a recipient is
a Client, an MLS member, or an Affiliate who is in
your MLS Address Book, you can click on an address button
(
TO, CC, or BCC
)
to open your personal Address Book where you can select their name and
email address.
(See the separate tutorial for instructions on using the
Email
Address Book
.)
-
Optional:
Click the "Select Files..." button
to attach a file that you can open directly from your device (and which is
not on the MLS server).
-
To insert an Internet address link
rather than the document itself, click on the Insert Hyperlink icon
 in
the formatting section (just above the body of the message).
in
the formatting section (just above the body of the message).
-
Enter the Subject
of the message in the designated box.
-
Click in the message
box and enter your message.
-
Note: To
undo any typed
entry
, you can either use the appropriate command for your device (such as Control+Z
keys in Windows, and Command+Z keys on Mac computers), or
highlight the entry and Cut/Delete it.
-
Optional: If you want to use a message
template, click the down button
 beside Templates and select
an existing Template from the list. (To edit a template message, see "
Edit and Send
an Email Template
" below.)
beside Templates and select
an existing Template from the list. (To edit a template message, see "
Edit and Send
an Email Template
" below.)
-
Email messages can contain code
for only one Template.
-
If you insert a template, it
will replace all information currently in the message, including the template for your email signature that is otherwise
automatically included in all your email from the MLS.
-
Most Templates include your
email signature merge field. If the template you insert does
not already contain code for your signature, you can add it by
-
clicking the location
in the message where you want your signature to appear;
-
clicking the down button
beside "Insert Merge Field"; and
-
selecting "
My Email
Signature
".
-
Merge Field Names are displayed
in [brackets] in the email message until the message is actually
sent (at which time the merge field information will be inserted
from the MLS database).
-
Optional: To apply formatting in the message,
first highlight the affected text or click on a location in the body of the
message, and then click the
appropriate format icon.
-
Pause your cursor over any icon in the toolbar to see its description.
-
To remove formatting, highlight the affected text and click the
appropriate
format icon
in the toolbar (formatting toggles on/off)
.
-
Optional: To insert a link to a
web
address, picture
or file on the Internet, click in the message to
set the insertion location, click the "
Insert
hyperlink
" icon
,
and enter the applicable URL address and title.
-
Optional: To display a listing image
(photo) in the email message, copy the link to the photo from the Listing "
Photos
# Columns
" Report, click in the message to set the insertion location,
click the Insert Image icon
 to paste the link and set the size of the image to display. Detailed steps
are provided in the "
Display
Listing Image in Email Message
" section below.
to paste the link and set the size of the image to display. Detailed steps
are provided in the "
Display
Listing Image in Email Message
" section below.
-
When your message is complete,
verify that "Send me a Copy" is checked if appropriate, and then click
the Send button above the address buttons at the top of the
Email screen.
-
To Close the Message screen without
sending, either
-
Click the Cancel button
beside the Send button at the top of the screen; - or -
-
Click Tools in
Navigator's menu-bar, and select
"New Message" to reset to a blank message screen; - or -
-
Select a different function in
Navigator's menu-bar.
-
Note that incomplete (or draft) messages
cannot be saved in Navigator.
To save a draft message, send it to
yourself
and complete it in your personal email application.
▲ Return to
Table of Contents ▲
CTI Navigator includes standard MLS reports for emailing links to all images
for listings that can be displayed in an Internet browser. Use the "Photos 1
Column" Report for the largest image size. Use "Photos 4 Columns" to display
thumbnail images.
To display a specific listing photo in an email message:
-
Open the Details Report for the Listing
-
Change the Report to one of the "Photos # Columns"
-
Right-click on the desired photo
-
Select "Copy Link" or "Copy Image Address" as provided by your
browser
-
Optional: If you intend to display more than one image:
-
Click Tools in Navigator's main menu-bar
- Select New Task (Tab)
-
From Home Page or under Tools, select "New Message" (on original tab or
new tab as appropriate)
-
Click in the body of the message where to insert the image
-
Click on the "Insert Image" icon
 in the email toolbar
-
On the Insert Image screen, replace "http://" in the Web Address
box with the link address to the image

-
Enter a Width or Height (in pixels) for the photo and click on
the insert button. Do not enter both width and height as this can
distort the image. Example sizes are:
-
100 for a small thumbnail (postage stamp) size image
-
200 for a small-medium size image (which is roughly the size of the
main photo on printed MLS reports)
-
300 for a medium size image
-
400 for an large image
-
If you do not specify an image size, the photo will display at
maximum (very large) size for its resolution.
To display an additional image in the same email message:
-
Keep your email message in Navigator open in one tab of your browser
-
Switch to Navigator in a different tab (which you can open by selecting
"New Task (Tab)" under Tools)
-
Repeat steps 1 through 4 to copy the link for another photo
-
Switch back to the tab displaying your email in Navigator
- Repeat steps 7 through 10 above to insert and size the image.
▲ Return to
Table of Contents ▲
To customize a pre-written email template and send it as your message:
-
Open New Message (in the Links on the Home Page or under Tools in Navigator's menu-bar).
-
Click on the
"CC, BCC
and other options"
button to expand the email options.
-
Enter Recipient's email address(es) in the
appropriate TO, Copy (CC) or Blind Copy (BCC) box.
-
Click the
down button
beside
Templates and select an existing template in
the list.
- Edit the Message Subject if desired
-
Click at the desired position in the message box and enter changes (by
typing or by using your device's paste function)
-
Always replace or delete any
yellow
highlighted
WORDS between and including
<
horizontal angle
brackets
> -- because these are just placeholders for where
you should insert specific information
-
Do not add, delete of modify any "Merge Field" information
in square [brackets]
--
unless you do not want Navigator to automatically insert the
referenced information from the MLS database
-
Use the icons in the toolbar above the message to Edit Font
(format, type, size and color); Align, Indent or Format
paragraphs; or
Insert or change hyperlinks, images, or files; create tables;
or remove formatting.
-
For example, you can u
se
the "
Insert
Hyperlink
"
icon
 in
the toolbar to enter your description and the URL address to
your
Agent Website
(whether the
free MLS-sponsored Agent Web or a third-party hosted website).
in
the toolbar to enter your description and the URL address to
your
Agent Website
(whether the
free MLS-sponsored Agent Web or a third-party hosted website).
-
When available
,
see the "Email Templates" tutorial for a more information
on
using the email toolbar options and buttons.
-
Click the Send button to send using all your changes; or click
Cancel to close the email without sending.
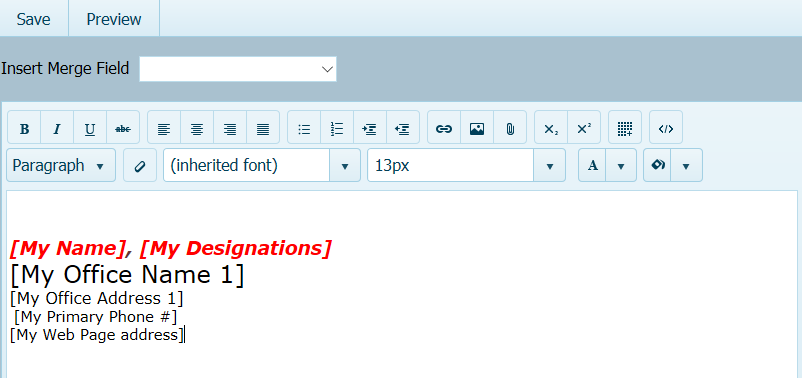
Your signature is a customizable email template in CTI Navigator Web.
To edit your default email signature,
first
click Tools, select "Edit Email Signature" to open a screen
similar to the following.
Then, to make changes:
-
Click in the message box and enter your customized information by typing and/or using
the email options in the toolbar above the message body. Pause your cursor
over any icon in the toolbar to see its description.
-
To apply
formatting or insert links in your signature, first
highlight the affected text or click on an insertion location in the
body of the message, and then click the appropriate format or insertion
icon.
-
Click the
down button
beside "Insert Merge Field" to select a data
field in your agent record to be automatically
inserted into your email signature when an email message is sent.
- Optional: Click Preview to see your revised signature.
-
Click the "Save" button to replace your previous
default signature with your revised signature as the default for all your
new email messages in CTI Navigator Web.
-
To cancel your changes and keep your previous default signature,
select a different function in Navigator's menu-bar without clicking the
Save button.
There is no system reset
to return to your original signature after you have saved changes. If you prefer to keep the default signature but also have a custom signature, you can
use your browser's controls to highlight and copy your existing
signature's merge fields from the body of the "Edit Email Signature" screen
(or as displayed in "
System
Default Signature" above
. Then
click Tools, select "Email Template Manager", paste these fields
into the body of a new email template, and customize as desired (see "
Create
an Email Template
" below).
▲ Return to
Table of Contents ▲
System standard email templates cannot be modified, but they can be copied,
and then the copy can be customized.
To copy and customize a copy of an existing Template message:
-
Click Tools in Navigator's menu-bar and select "
Email Template
Manager
".
-
Click the
down button
beside
Templates and select an existing template in
the list.
-
Click the Copy button at the top of the Template Manager
screen
-
Edit the Template Name and Subject in the top section of the
screen
-
Click at the desired position in the message box and enter your changes by
typing and/or using the email options (Edit Font or Paragraph, Insert Image
or hyperlink, create Table) in the toolbar above the message.
(For more information about editing a Template, see "
Edit and Send
an Email Template
" above.)
-
Click "Save" to keep the customized message and add it
to your list of Templates in CTI Navigator II.
- To start over without saving changes, click the "New" button.
To create a new template message:
-
Click on Tools in Navigator's menu-bar and select
Email
Template Manage
r.
-
Click the "New" button at the top menu of the Template Manager
screen
- Enter a descriptive Template Name and Subject in the designated boxes.
-
Click in the message box and enter you customized information by typing and/or using
the email options in the toolbar above the message body. Pause your cursor
over any icon in the toolbar to see its description.
-
Optional:
-
To apply
formatting or insert links in the message, first
highlight the affected text or click on an insertion location in the
body of the message, and then click the appropriate format or insertion
icon.
-
Click the
down button
beside "Insert Merge Field" to select a data
field in your agent record or your client's record to be automatically
inserted into the email message when sent.
-
For example, if you select [Client's First Name], Navigator will
automatically insert the first name of the client to whom you address
your message.
-
Click the "Save" button to keep the message and add it
to your list of Email Templates.
This concludes the
tutorial on Creating Email Messages and Templates in CTI
Navigator Web II.
▲ Return to Table of Contents for Email
Messages and Templates ▲
To return to the Index of Tutorials
for CTI Navigator II
, click here
.
{
Create_Email_Message_and_Use_Message_Templates.aspx
|| rev.11.24.2017}