 ( Click on image to enlarge)
If the Add/Revise tool does not display in your screen, then your Broker has not notified the MLS to give you permission to add and edit properties.
You can click on any topic in this table to go directly to that section in this tutorial.
Touchscreen Note. Where instructions are to select or click, touchscreen device users would touch, press or tap as appropriate for your device.
Welcome to the tutorial on how to Add, Edit, or Copy a Listing or a Rental property in CTI Navigator Web II. This tutorial is applicable only to MLS members whose Broker has given permission to add or edit properties in the MLS.
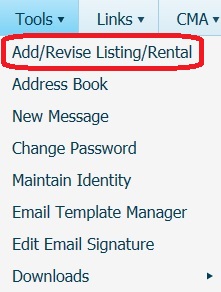
To Add or Edit a property,
click on TOOLS in Navigator's top menu, and select "Add/Revise Listing/Rental".
( Click on image to enlarge)
If
the Add/Revise tool does not display in your screen, then your Broker has
not notified the MLS to give you permission to add and edit properties.
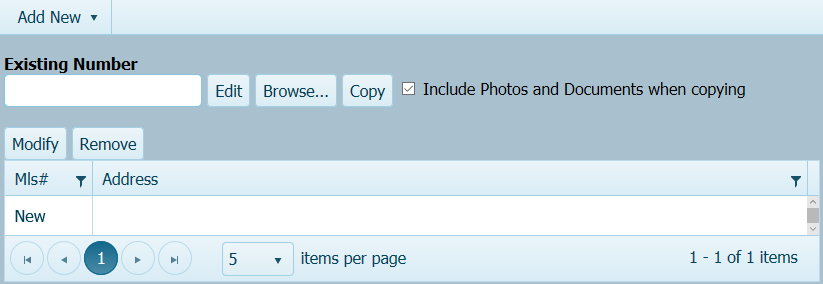
The main screen for Add or Revise Listing displays a list of all properties for which you have already entered at least some information, but have not yet finished and sent into the MLS. If you were revising an existing listing or rental, its MLS# and address will be displayed. If you started a new listing but did not finish, "New" will display in the MLS# column. The Modify tab and Remove tab apply only to properties in this list. We will refer to this list as the Outbox.
If you have not already entered and saved some listing or rental property information, your Add/Revise Outbox will be empty.
At the Top of the Add/Revise Listing main screen, is a button to “Add New” (and some MLS's also have an “Add Linked” button).
On narrow screens, these buttons may be
collapsed into a menu button
![]() at the top of the screen.
Click on this menu button to display the "Add New" button (and, where
applicable, the "Add Linked" button).
at the top of the screen.
Click on this menu button to display the "Add New" button (and, where
applicable, the "Add Linked" button).

Immediately below the Add/Revise toolbar is a box for entering an “Existing Number”. Immediately below this box are buttons to Edit, Browse, or Copy, and a checkbox to "Include Photos and Documents when copying."
To Add a New Listing or Rental property, click the Add New button and then select the appropriate Form Type in the drop-down menu – such as Residential, Condo, Commercial, Rental, and so forth. This will open the Status tab in a "Compose New..." screen that is specific for the selected Form Type. We will describe using Compose screens a little bit later in this tutorial (you can click here to go directly to the Status tab section).
To revise an existing Listing or Rental, enter its MLS# in the box below “Existing Number” and then click the Edit button. This opens the same Compose screen Status section as opens for Add New, but the information is prefilled for the existing Listing or Rental property.
To LINK a New Listing to an existing listing (if linking is supported by your MLS), enter its MLS# in the box below “Existing Number”. Then click the “Add Linked” button in the top toolbar.
A Linked listing is basically a listing that is duplicated in a different Form Type and shares key fields, such as Price and Status, that are synchronized with the original listing. Any change to a linked field in one listing is automatically reflected in the same field of the linked listing. Because they are the same listing, but entered in 2 different places in the MLS (such as in Residential and also in Acreage), only the listing that was entered first is counted in MLS statistics.
If your MLS does not support linked listings, there will not be an "Add Linked" button on your screen.
Select a property in the Outbox and click the Modify tab to open the Compose screen for this listing.
Select a property in the Outbox and click the Remove tab to delete it from the Add/Revise Outbox. Any new or changed information about that property will not be saved. Information already sent and saved on the MLS server will not be affected by removing the listing from the Outbox.
▲ Return to the Add/Edit Table of Contents ▲
You can copy only your own listings or rentals. The copy feature is especially useful when entering nearly identical lots, or re-entering the property information for a previous listing that went off-market. Just change the fields in the copy that are different from the original (such as part of the Tax ID, address, price, and list or expiration date as appropriate).
To create an exact copy (except for MLS# and Status) in the same Form Type of all the information for one of your listed properties:
If the existing listing is already in the Add/Revise Listing Outbox, select the listing to be copied, check or un-check the box beside "Include Photos and Documents when copying" as appropriate (see note below), and then click the Copy button.
If the existing property you want to copy is not already in the Add/Revise Listing Outbox, enter its MLS# in the Existing Number box at the top, check or un-check the box beside "Include Photos and Documents when copying" as appropriate (see note below), and then click the Copy button.
Note: Do not check to include photos or documents for listings or rentals that expired more than one year ago (because old photos and/or documents may no longer exist on the server and that could cause the copy function to fail).
If you copied an existing listing from the Add/Revise Outbox, select the original in the Outbox and click the Remove tab. This leaves the original listing unchanged, but serves to prevent accidentally sending the original listing or rental back to the server later as if you were updating it. You can easily distinguish the original from the copy because the original will have an MLS# and the Copy will show "New" as the MLS# (until it is finished and sent to the server).
To continue entering or changing information for a property in the Add/Revise Outbox, first select to highlight the property on-screen, and then click the Modify tab.
Lets go now to the screen where you can enter a NEW listing. For this tutorial, we will use Residential Listing as our example – but the process is the same for all Form Types, including Rentals where available.
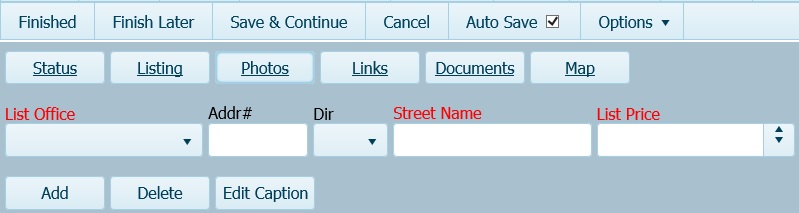
Click the “Add New” button at the top of the Add/Revise Listing screen to start and, for this example, select Residential in the drop-down box. This will open a "Compose New Residential" screen displaying Finished, Finish Later, Save & Continue, Cancel, Auto-Save, and Options buttons in the toolbar just below Navigator’s menu-bar at the top.

In the Compose Toolbar, the "Auto Save" box is checked by default. This sets Navigator to automatically save your text entries in a temporary file on the MLS server (approximately once every minute).
Auto Save does not function until you have entered at least a Street Name that can be used to identify and distinguish this new listing from any other new but unfinished listing in your Add/Revise Outbox.
To prevent interrupting (and possibly corrupting) the transmission of image files, Auto Save does not function when you are on the Photos or Documents entry screen.
You may want to un-check Auto Save if your Internet connection is very slow or unreliable, or if you do not want to be interrupted (by momentary pauses) while entering information (e.g., when speed typing or extensive editing).
To save a temporary copy as your enter or edit photos, documents or text, click "Save & Continue" in the toolbar before you click Finished.
Click “Finish Later” at the top toolbar or menu button to save what you have entered so far, but to not send this information to the MLS Server yet. To avoid losing data if an error occurs during data entry, you may want to click either "Save & Continue" or "Finish Later" after entering data for several minutes, or just before changing tabs. This is especially advisable while adding photos.
Click Finished once you have entered all required information and want to immediately send the Listing or Rental to the MLS Server. The server will then return the MLS number it has assigned to the Listing or Rental.
Click Cancel to not save anything you entered from the last time information was saved (manually or by Auto Save if it is enabled).
▲ Return to the Add/Edit Table of Contents ▲
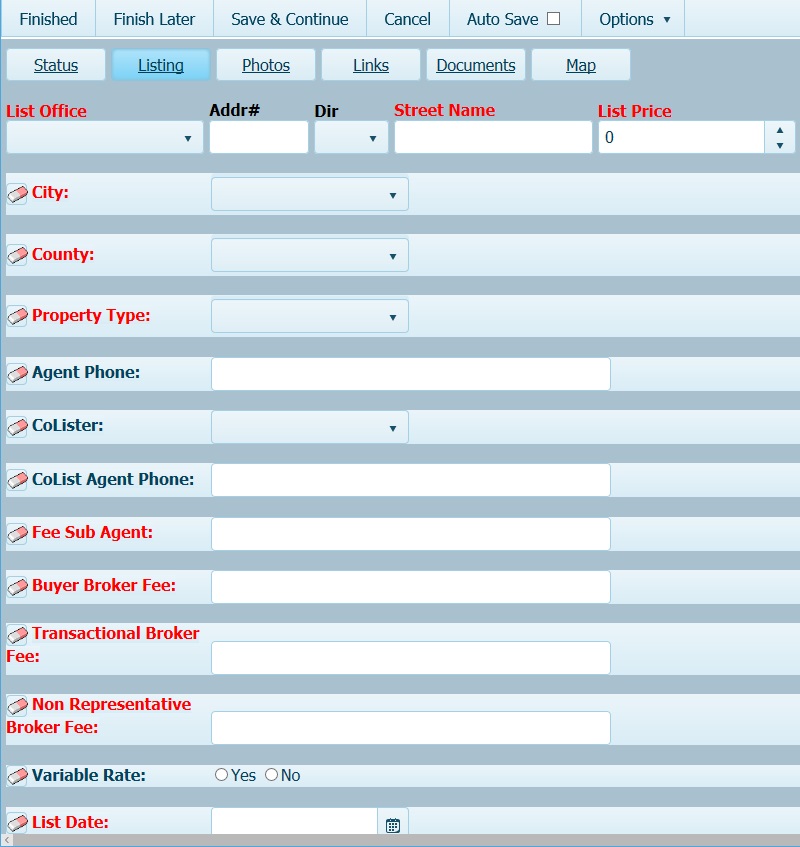
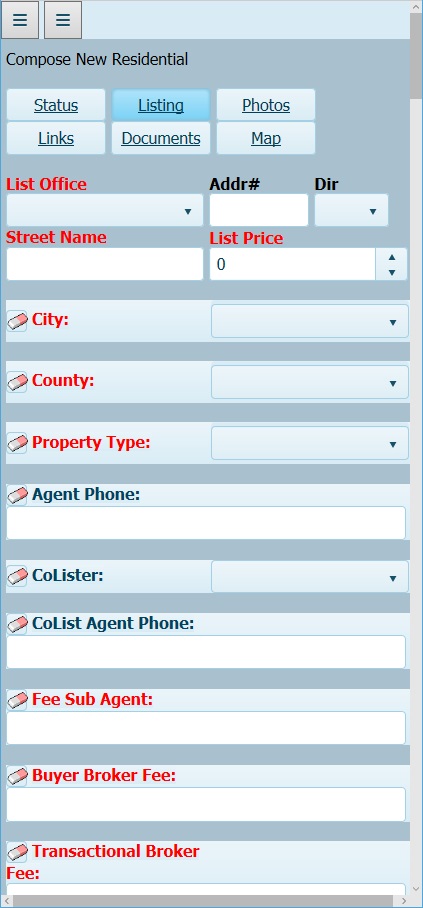
Immediately below the compose toolbar are six tabs: Status, Listing, Photos, Links, Documents, and Map. Enter the Details about a property by selecting the appropriate TAB.
Most of the entry fields are self-explanatory. Note that you must enter information for items displayed in Red before you can send the listing to the MLS server.
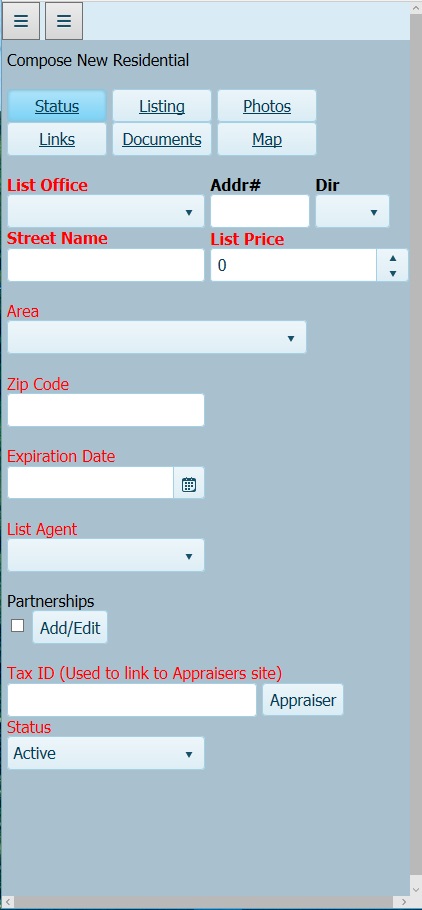
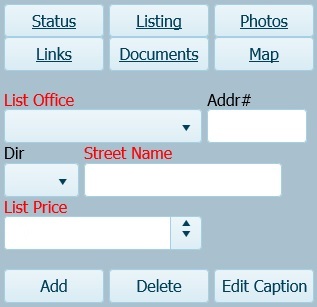
When you first open a new or existing listing or rental in Add/Revise, the Status tab below the Compose toolbar will be preselected. The screen will be formatted similar to the one below. On narrow screens the toolbar will be collapsed into a menu button at the top. Some of the field names may be different from this example because they have been customized for your MLS.
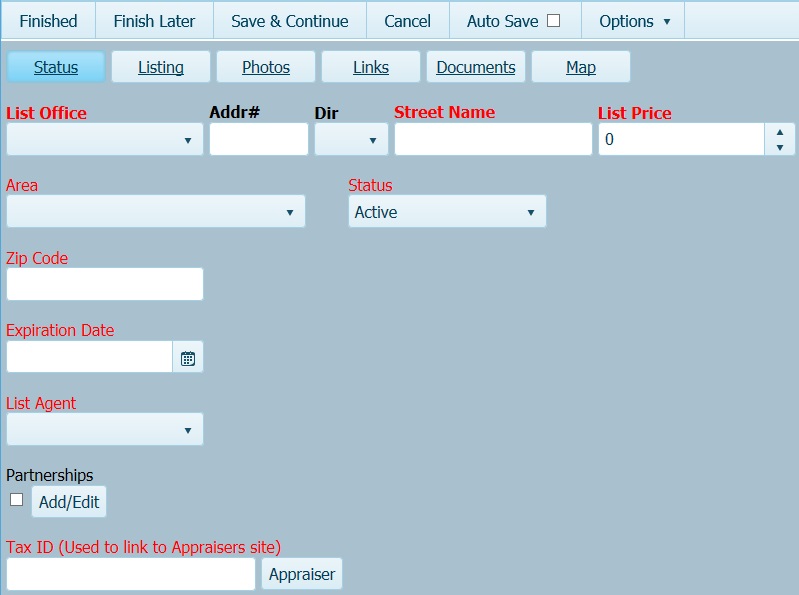
Enter the basic identifying information for the property immediately below the Status tab at the Top of the screen. Typically that is its Address Number, Street Direction, Street Name, and List (or Rent) Price. This is followed by boxes to enter such items as Area (or Zone), Status, Zip Code, Expiration Date, Partnerships, and Tax ID.
If your MLS uses Zone instead of Area and you are not sure which code to use, click "Zone Help" beside Zone on the Status tab to see a map displaying the zones.
If your MLS uses Area and you are not sure which code to select from the drop-down list, you can click "Finish Later" in the Compose Toolbar to save any information you have already entered. Then click on “Area Map” under Links in Navigator's main menu-bar to see the Area information provided by your MLS in a separate tab from Navigator. The Area Help usually includes a color coded map displaying the area boundaries. You can leave the area map open while using Navigator.
For Expiration Date you can either
click inside the Expiration Date box and type 2 digits for month, two digits for day and 4 digits for year; - or -
you can select the date by clicking on the CALENDAR icon.
To change the month in the calendar, click on the left or right arrows in the calendar heading. This will scroll back or forward one month at a time.
To change the year in the calendar, click on the year in the calendar heading, and then click on the left or right arrows.
The expiration date for an Active Listing must be today’s date or later (i.e., the listing cannot be already expired before being entered).
To add a listing that Sold outside of the MLS for use in Comps, select Status as Sold, type the Expiration Date (instead of using the Calendar), and then enter information in all required fields.
If this is a co-listing with one or more Partners, click the Add/Edit button beneath Partnerships. On the "Credit Splits" screen, click the "+ Add New" button, click the down arrow beneath the Agent column or click the Browse button at the top of the screen and select your partner’s name. Then click in the Credit column beside the agent name and enter the appropriate credit split (as a percent, up to two decimals). The Total at the bottom of the Credit column must equal exactly 100 percent . If you encounter a problem, click Cancel to clear all credit split information. Click the Ok button to save the partnership information, and return to the Status screen. The checkbox beneath Partnerships will be checked automatically if the partnership credits were entered properly. If you un-check this box, all the partnership information for this listing will be deleted immediately.
If you have entered the property address and Zip Code but are unsure about the Tax ID, click the Appraiser button beside the Tax ID box to open the local Property Appraiser’s website (where available) in a separate browser screen. Usually you can search the Property Appraiser’s website by either property Address or Owner’s Name to find the property Tax ID.
If CTI Navigator for your MLS contains integrated tax data on its server, a “Pre-fill from Tax Data” button will display beside (or below on narrow screens) the Tax ID entry box. Where available, you can click on this button to have the system automatically transfer compatible information about the property from the tax database on the server into the listing data fields. Automatic transfers do not fill all MLS fields, and may not work at all for some properties. Whatever data is automatically transferred should always be verified by the listing agent.
To save the data you have entered so far, click either "Save & Continue" or click "Finish Later" in the Compose toolbar (at the top of the screen). To re-open after clicking "Finish Later", select the listing in the Add/Revise Listing outbox, and either double-click on it, or single-click to select it and then click the Modify button. This will re-open the listing in the Compose screen where you can select a tab and enter the appropriate data.
▲ Return to the Add/Edit Table of Contents ▲
Click the LISTING tab to enter or verify all of the text and numeric information about the listing.
When entering data, click inside any empty box and type the appropriate information. You also can paste text information (as long as it does not contain custom code).
If there is a single button with an down arrowhead beside the entry field, click the button to select from a list. If the button shows both up and down arrowheads beside the entry field, you can either click on the appropriate arrowhead to increment the value or line of text in the box, or you can click in the box and type a value or text as appropriate.
Fields that support multiple lines of text entry (such as Directions or Remarks) automatically expand as you enter text. Formatting (such a bold, underlining, line breaks) is not supported. To determine how much of the text you enter will display in MLS reports, click on "Print Preview" just below the field name (on the left).
Where a list of checkboxes is displayed, check all of the appropriate items.
For Yes – No entries, click on the radio button to the left of the appropriate yes or no indicator.
To completely clear
what has been entered in any field, click the eraser icon
![]() beside
the data entry field.
beside
the data entry field.
If entry options are not visible for an item, click on the item name to display its entry field(s).
As soon as you have entered all the available data, you may want to click the "Save & Continue" button to save what you have entered so far.
▲ Return to the Add/Edit Table of Contents ▲
Click the PHOTOS tab to add an image, add a caption, rearrange the sequence, rotate, or delete any photo that belongs to this listing or rental property.
Photos currently associated with the listing (if any) will appear as thumbnail images in a Photo Gallery. They will display in top to bottom sequence in reports as shown from left to right in this gallery. To change the sequential position of a photo, click/press-and-hold on the thumbnail image, and drag-and-drop it at the desired position n the photo gallery.
Once uploaded, the captions for existing photos can be edited, but the saved image itself cannot be re-edited. To change an existing image, delete it and add it again with desired revisions.
To add a photo that is not currently in the Photo Gallery for a listing, click the Add button (see Old IE Warning below). Then, on your device's photo or file viewer (such as Windows File Explorer, Mac Finder, or Smartphone Photo Library), select the location where the photo is stored. Click on the desired photo to select it, and then open it. (The image file cannot be in a compressed or email format.)
Old Internet Explorer (IE) Warning: Old versions of Internet Explorer (prior to IE 11) do not support the Add Photos function. If you are using Windows Visa or XP, you need to run Navigator II in a current version of Firefox, Chrome, or Opera to be able to add photos.
To add multiple photos, use the multiple selection technique appropriate for your device (such as depressing the Ctrl or Shift key while selecting multiple images in Windows). Note however, that when you "batch" select a group of several photos, your device may upload the files to Navigator in the order they are physically located on the storage media (such as on a hard drive) rather than in the sequential order in which they are viewed on screen.
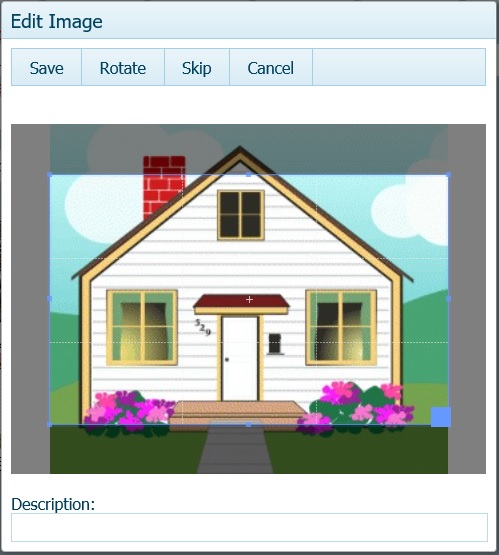
The selected photo opens in Navigator's Edit Image screen. The photo will be automatically sized and centered to fit in the edit screen. A faint nine (9) panel cropping frame will overlay the image. The area beneath the cropping frame will be highlighted and any image area outside the frame will appear darker. See "Original Image" example below.
If needed, click the Rotate button in the toolbar above the photo to rotate the image 90 degrees clockwise each time you click. Otherwise, you can move or resize the cropping frame, and/or resize the image itself as described below.
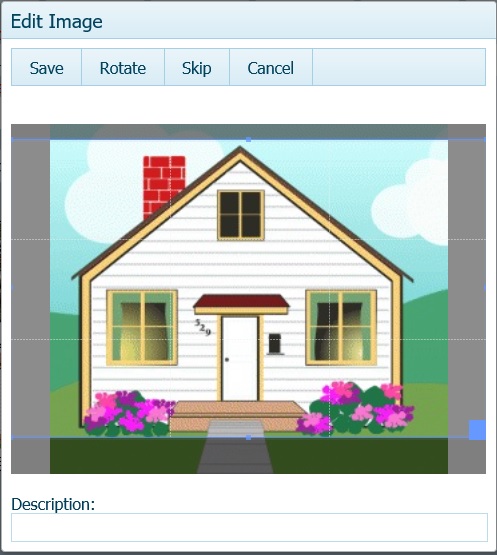
To move the cropping frame around, click (or touch)-and-hold anywhere inside the cropping frame (a mouse pointer normally displays a 4-headed arrow), and drag to move the frame over the desired part of the photo. The cropping frame stays the same size when being moved around, and keeps the same aspect ratio (of width to height) if being resized.
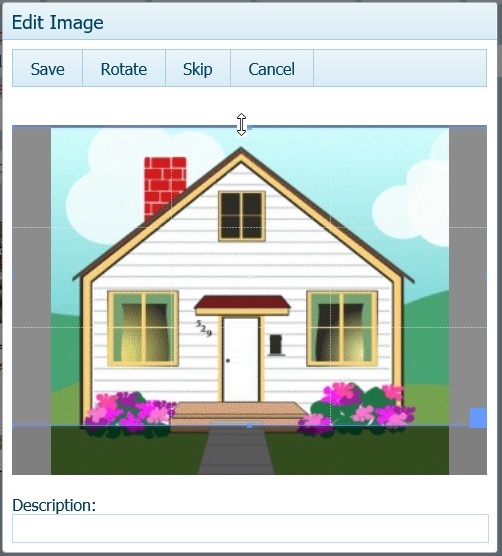
To adjust the size of the cropping frame (if needed), click-(or touch)-and-hold on one of the perimeter lines or corners of the cropping frame (a mouse pointer normally displays a 2-headed arrow), and drag to resize the frame. To maintain the same ratio of height to width (that is required for the photo to fit in reports), dragging one side (horizontally or vertically) of the frame will automatically resize the entire frame (i.e., if you widen the frame, the height will increase proportionately, and vice versa). The cropping frame cannot extend beyond beyond the edit screen area. Once either the height or width reach their maximum size, the other dimension (width or height) cannot be increased further.
Tip: To maximize frame size while keeping the frame centered, click-(or touch)-and-hold on either the top or bottom perimeter line and drag it to the respective top or bottom of the edit screen.
Once all (or the desired portion) of the image completely fills the cropping frame as desired, you can type a caption in the Description box at the bottom of the screen (if desired) and then click the Save button in the Edit Image toolbar. Only the image area inside the cropping frame will be saved.
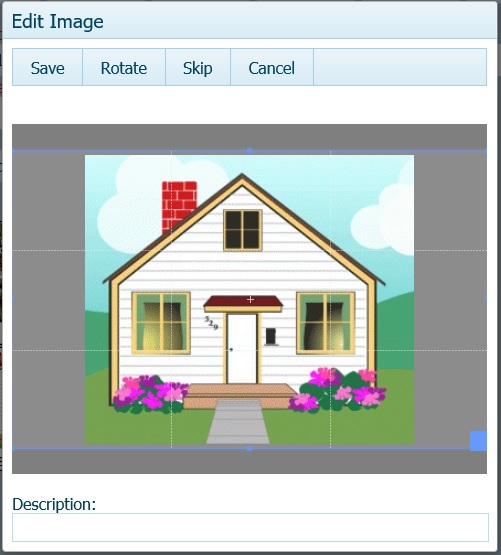
To adjust the size of the image:
with a pointing device (such as a mouse), click on the image and roll the scroll wheel (or touch pad equivalent) up or down to zoom in or out on the image.
on a mobile device (or other touchscreen that supports gestures), place two fingers on the image and pinch to zoom in or out (if supported by your device).
To prevent blank white strips appearing beside a photo, adjust the image size (or selected portion of the image) to completely fill the cropping frame (both horizontally and vertically). Original images whose width is 1.6 times their height (landscape orientation) will best fill the cropping frame. It is not always possible to completely fill the frame, especially when the original image is in portrait (tall) or panoramic (wide and narrow) orientation.
▲ Return to the Add/Edit Table of Contents ▲
Cropping Example -Tall Original. 1. Original image is taller than default cropping frame (so part of top and bottom lie outside the frame). 2. Drag the top line of the cropping frame to the top of the edit screen (which also maximizes the width of the frame). 3. Drag maximized frame over main area of photo (which may leave narrow white strips on both sides of cropped image). 4. Reduce image size to fit entire original image inside cropping frame (which will capture entire original image but may leave wide white strips on both sides of cropped image).
Click the Save button to save the image as displayed (after making adjustments) inside the cropping frame and close the Edit Image screen.
Click the Rotate button to rotate the image 90 degrees clockwise each time you click the button.
If you selected to add multiple images and do not want to save the current image, click the Skip button to discard the current image and to automatically open the next selected image for editing.
Click the Cancel button to discard all selected images that have not been saved, and return to the Photo Gallery grid.
To reposition a photo in the Photo Gallery, click/touch the thumbnail image to select the photo. Then continue to click/press-and-hold on the image, and drag it to the desired position.
To add or edit a caption to a photo already in the Photo Gallery, click/touch the thumbnail image to select it. The selected image displays a check mark in the selection box at the bottom of the image. Then click the "Edit Caption" button just above the Photo Gallery and type a brief description in the text entry box below "Enter Photo Caption." Enter the most important part of the description first since that may be all that is visible on thumbnail images. Click the OK button to save the new or revised caption with the photo. (Note that the saved image itself cannot be re-cropped.)
To remove one or more photos from being associated with the listing or rental, click/touch the small checkbox at the top left corner of the thumbnail image to select each photo. Then click the Delete button. If you accidentally delete the wrong photo, it must be added again (there is no un-do).
Once you have entered, labeled (as appropriate), and positioned all the available photos for this Listing or Rental, on the Compose toolbar you can:
click "Save & Continue" (to prevent file corruption while changes are in process, Auto Save does not function for photos or documents) and then click on another tab (such as Links, Document or Map); - or -
click "Finish Later" to save the photos with the listing and return to the Add/Revise Outbox; - or -
click Finished to send the entire listing/rental information and photos to the MLS server to update an existing listing or to assign an MLS number to a new listing; - or -
click Cancel to discard these photos and return to the Add/Revise Outbox.
▲ Return to the Add/Edit Table of Contents ▲
If you have a Virtual Tour link, or the Internet address to some website outside the MLS that provides information about your listing or rental, click the LINKS tab.
In the designated box, enter the full "Virtual Tour Url" (Internet Address), including “http://www.” or "htpps://" as appropriate, to your Non-Branded Virtual Tour. Non-branded links do not display a listing agent, office, brokerage, franchise, or non-MLS marketing service. Virtual Tours are hosted by third-party vendors (not by the MLS).
You can verify that a URL address is correct (and non-branded) by typing or pasting it into your Internet browser’s address box.
Click the “DOCUMENTS” tab to open a screen where you can add, view or delete documents attached to a listing or rental.
To attach a document to the listing or rental, click the Add Document button in the Documents toolbar. Then select the appropriate option:
Attach an Existing PDF document
Enter an Internet URL address.
If your document already exists and is in PDF format, select “Attach Existing PDF document.” In the Open or Select screen for your device, browse to the location of the existing PDF document, select and open the document. To ensure that you have added the correct document, you can select it in the Document list and click the View button in the toolbar. Attached PDF documents are saved on the MLS server.
Word processing documents (such as .doc, .rtf, .wpd, .wp, or .xps format files) must be converted into a PDF document before they can be attached to a listing. The easiest way to convert a document to PDF usually is to select "Print to PDF" or "Save as PDF" if available in your device's printer dialog screen. Otherwise, you can use an online converter (such as FreePdfConvert.com or pdfCreator) or a third-party Print-to-PDF program (such as Cute PDF Writer, Bullzip PDF Printer, or PDF Creator) to convert a word processing file to a PDF format.
To link a listing to a document that is accessible on a web page that is outside the MLS, select “Enter an Internet URL” under Add Document. Then enter both the Internet URL Address and also a Display Name. The Name should briefly describe the linked document. If appropriate, you can link your listing to a number of documents, each with its own web address.
To remove a document that is already attached to the listing or rental, select the document in the list of documents; and then click the Delete button. If you inadvertently delete a document, click the Cancel button. However, beware that if you click Cancel, none of the additions or changes that you made since the last time you clicked Save & Continue, Finish Later or Finished will be saved.
To save the attachments to documents that you have entered, click the "Save & Continue" or “Finish Later” as appropriate. To prevent interrupting (and possibly corrupting) the transmission of image files, Auto Save does not function on the Documents tab.
▲ Return to the Add/Edit Table of Contents ▲
To confirm or set the location of the
property on a MAP after entering at least its address on the Status tab, click the Map tab. If the property address is
in the Map database, Navigator will automatically place a colored,
teardrop-shaped marker pin
![]() at the property address on
the map. If Navigator cannot automatically locate the property on
the map, the Map tab will open
the map in zoomed out view.
at the property address on
the map. If Navigator cannot automatically locate the property on
the map, the Map tab will open
the map in zoomed out view.
To adjust the view
to display where the property is located on the map, use the
Zoom and Pan controls on the
map toolbar (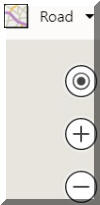 click to enlarge image). This toolbar is inside the top corner of the
map. If desired, you can change the type of view
by pausing your cursor over (or touching on a
touchscreen) the current view name (usually "Road") at the top of the map
toolbar and selecting Road, Aerial,
Bird's Eye, or Street (where available).
click to enlarge image). This toolbar is inside the top corner of the
map. If desired, you can change the type of view
by pausing your cursor over (or touching on a
touchscreen) the current view name (usually "Road") at the top of the map
toolbar and selecting Road, Aerial,
Bird's Eye, or Street (where available).
If your device has a touchscreen that supports gestures (used by most Smartphones and tablets), you can Pan (move the map) with one finger or Zoom using two fingers to pinch in or out on the map. If your device uses a pointer such as a mouse, you can Pan the view by clicking-and-dragging on the map, or you can Zoom by scrolling the mouse wheel Forward to zoom In or Back to zoom Out.
To set the marker to the correct location on the map:
Pan and zoom to display the appropriate section on the map (as described above).
Click the "Set Location" button immediately above the map.
Then click/touch on the desired location on the map.
To move the marker if an adjustment is needed, you can click/touch-and-hold on the marker pin and drag it to the correct map location. Alternatively, you can click/touch the "Set Location" button immediately above the map and then click/touch on the desired location on the map.
If you have entered all required information (under all tab) and are ready to send the listing/rental to the MLS server, click Finished in the compose toolbar. Otherwise, click "Finish Later" to save what you have entered so far to the Add/Revise Outbox in the main Add/Revise screen.
This concludes the tutorial on Adding or Editing Listings or Rental Properties in CTI Navigator Web II.
▲ Click here to Return to the Top of this web page ▲
To return to the Index of Tutorials for CTI Navigator Web II, click here.
[Rev.11.21.2017]