Reduce PDF or Image File Size, or Rotate an Image
There are several ways to reduce a document's file size to attach
in PDF format in CTI Navigator. If you
have the original document(s) and a scanner, you can:
- Re-scan
the document at lower resolution. This usually is the quickest and
easiest fix. If you scanned the document in color, try scanning in gray scale.
If your gray scale scanned file is too large, try scanning as Black and White
(1-bit resolution).
- Re-scan
the document in parts (or separate one document
into several smaller documents) so that each individual file size is less than 1
MB. For example, Part 1 and Part 2; or Main Document and separate Addenda
documents.
- Scan each page of a multiple page document as an image,
save each image as its own file, and then use the Create
PDF tool in CTI Navigator Desktop's Document Manager to link these image
files together in one PDF document.
For instructions on using CTI's create PDF tool, see "Use
Document Manager & Create PDF" on CTI's Help
and Tutorials website.
If you cannot reduce the file size sufficiently with a scanner, do not have
a scanner, or your original is a text file (such as a Word, PowerPoint or
Excel document), you can print the file to a
third-party PDF printer utility that will electronically convert its format to
PDF. Many popular PDF
converters are free to download and use (such as Cute
PDF Writer, Bullzip PDF Printer, or PDF
Creator), although some may display advertising either in the document or during
the creation process.
To convert an existing document (or image) file to a pdf formatted
file, you also can use free web-based document conversion
services that do not need to be installed on your computer (such as
http://convertOnlineFree.com/ , www.freePDFconvert.com,
http://docuPub.com/pdfConvert, or www.zamzar.com) . Some third-party PDF
converters, such as http://docuPub.com/pdfConvert,
offer compression options to help reduce the size of a PDF file.
To quickly reduce the size of an existing PDF File on a Mac with OS X:
- Double-click on the PDF file (or right-click on it and select "Open
With") to open in Finder's Preview
- In the Preview menu click Export
- Click the button beside "Quartz Filter" and select "Reduce
File Size"
- Click Save.
If your PDF file contains high resolution color images, you can use the
"ColorSync Utility" on your Mac to reduce the file size:
- Open Spotlight (press "Command+Spacebar" keys)
- Type colorsync
- Click File > Open > select a PDF file >click Open
- On the pop-up Filters screen click on the Filters icon
- Select "Reduce File Size"
There are several free online tools than can be used to
reduce the size of pdf files.
- One of the simplest to use is at
https://smallpdf.com/compress-pdf .
Here you can upload or just drag-and-drop your existing PDF file
into an on-screen box and it will be compressed automatically. (See
also http://pdfcompressor.com/
.)
- At
https://docupub.com/pdfcompress/ you can upload a PDF file
and select from a variety of compression settings and options. You
also can remove bookmarks, annotations, PDF layers, article threads
and other undesired file components. (See also
www.PDF2Go.com/compress.)
- To reduce the size of up to 20 PDF files online, go to
http://pdfcompressor.com/ .
Unlike some other services this tool doesn't change the DPI, thus
keeping your documents printable and zoomable.
Large images should be reduced in size (to 55 KB or less) before
adding them to a flyer or custom report in CTI Navigator. You can use the basic image management tool called
"Paint" that is included as an accessory in all supported versions of Windows
to resize images.
To Resize a picture or image using "Paint" in Windows
10, 8, 7 or Vista (click
here for video)
-
Open Paint:
-
In Windows 10: click the Search
icon or box, type Paint, and click on the Paint desktop
app.
-
In Windows 8: on the Tiles screen,
type Paint, and click on the App icon for Paint

-
In Windows 7 or Vista:
click the Start
button  > click All Programs >
click Accessories > then
click Paint.
> click All Programs >
click Accessories > then
click Paint.
-
Click File in Windows 10 or 8 or on the Paint button
 in Windows 7/Vista > click Open > select the picture
or image you want
to resize > then click Open.
in Windows 7/Vista > click Open > select the picture
or image you want
to resize > then click Open.
-
On the Home tab, in the Image
group, click Resize.
-
In the Resize and Skew
dialog box, select the Maintain aspect ratio
check box so that the resized image will have the same aspect
ratio as the original picture.
If the Maintain aspect ratio
check box is selected, you only need to enter the horizontal
value (width) or vertical value (height). The other box in the Resize
area is updated automatically.
-
Do one of the following in the Resize
area, and then click OK:
-
To resize your picture by a certain
percentage, click Percentage, and
then enter a percentage to reduce the width by in the Horizontal
box, or a percentage to reduce the height by in the Vertical
box.
-
To resize the picture so it's a specific
size, click Pixels, and then enter a
new width in the Horizontal box, or
new height in the Vertical box.
-
Click File in Windows 10 or 8 or the Paint button
in Windows 7/Vista > point to Save as > then click the
picture file type for the resized image.
-
Type a new file name in the File
name box, and then click Save.
To Resize a picture or image using "Paint"
in Windows XP
-
Click Start > All Programs
> Accessories > Paint
-
On the Paint Menu, click File
> Open > change "Look In" to the
location of the image to be resized > click Open
-
On the Paint Menu click >
Image > Stretch/Skew
-
To maintain the original
width-to-height aspect ratio, enter the same percent (such as
50%) for both Horizontal and Vertical under Stretch.
Note: Do not enter any Horizontal or Vertical Degree
value under Skew.
-
Click Okay to preview the resized
image
-
Click File > "Save As" >
enter a filename > click Save.
In Windows XP you also can use the "Windows
Picture and Fax Viewer" to reduce the size
of an image:
- Double-click on the image file to open it
- Right-click on the image
- Select Resize Picture
- Select Small or Medium
- Click the OK button.
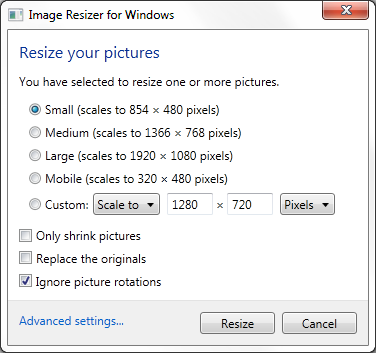
In any version of Windows, you can download and install "Image
Resizer for Windows" from
Microsoft's free open source project hosting website. "Image
Resizer for Windows" is a free utility that lets you resize one or more
selected image files directly from Windows Explorer or File Explorer by right-clicking
on the file and selecting a preferred size. (Left-click on thumbnail images
below to enlarge.)
Third-party photo editing programs (such as Photo
Shop or Paint Shop Pro) also can be used to
resize graphical image files.
Alternatively, you can use free photo
editing programs such as
PIXresizer (download), Shrink
Pictures (online), FlipMyPhotos
(online), Google's Picasa (download),
Google Photos,
or GIMP to
easily reduce the size of an image.
In Picasa:
- Select the image
- Click Export
- Specify the Location and Name of the Exported Folder
- Set the Image Size Option to 800 pixels or lower
- Leave the Image Quality set to Automatic (or
change to Normal)
- click the OK button.
▲ Back to the top of this page
Photos taken with some cameras (especially iPhone and iPad cameras using iOS 5
and later) may need to be rotated and/or saved in correct orientation before
being uploaded into CTI Navigator. (See "Fix
Photo Orientation" for details.)
You
can easily rotate
a photo or
scanned image in a clockwise or counterclockwise direction in Windows as follows.
Paint users in
Windows 10, 8 and 7:
- Open the image in Paint (one of the Windows
Accessories apps).
- Click the Home tab
- Click the Rotate Icon
- Select Rotate Right 90º,
Rotate Left 90º, Flip Vertical, Flip Horizontal.
Paint users in
Windows Vista and XP:
- Open the image in Paint (one of the Windows
Accessories programs).
- Click Image
- Click Flip/Rotate
- In the box that opens, select to flip an image
horizontally or vertically, or rotate the image by 90, 180, or 270
degrees.
PIXresizer
(download) can be used to both rotate images and reduce their file size.
To rotate a photo on a Mac, launch the iPhoto app. Then select
File, Import, Rotate Clockwise (or Counterclockwise).
Online service: You also can resize, rotate, flip or crop an image in your browser by using
an online image editor such as the free
Google Photos, or
FlipMyPhotos.
For additional information on using
Photos in CTI Navigator, see
also "Fix
Photo Quality Issues (Resolution, Orientation, and Image Sharpness)."
Related articles and Internet Links:
To return to CTI's menu of Help & Tutorials,
click here
or use the back arrow at the top of your Internet browser.
To go to CTI's Menu of Error Fixes, click here.
{rev.
10.30.2017}