
MLS members can easily export selected listing data from either CTI Navigator Desktop or CTI Navigator Web as described below.
Export saves the selected data fields for properties that match search criteria into a text file. To export data, select Export from the File menu on the Data Table. In the "Save in" box, enter the path and name of the file to export into if it is different from the default. In the Layout box, select a previously saved table layout. (A layout must be defined either in a previously saved layout file or by first going to the Table view.) Specify Comma Delimited or Tab Delimited format. Indicate if Field Names should be included on the first row, and how many photos should be included per property. See below for details.
To export the data from a Search Results table to another application, select Export under the File menu.
Ensure that the appropriate data are highlighted in the data table before selecting Export. Programs for which there are predefined export formats are displayed under the Predefined tab. Select the appropriate program and click the OK button. The default location for the export.log is under ...\CTI Navigator\{YourMLS} \Users\{YourUserName}\Export\. Stored in this folder will be the Export.log file and any .jpg files of the main photo associated with the exported properties.
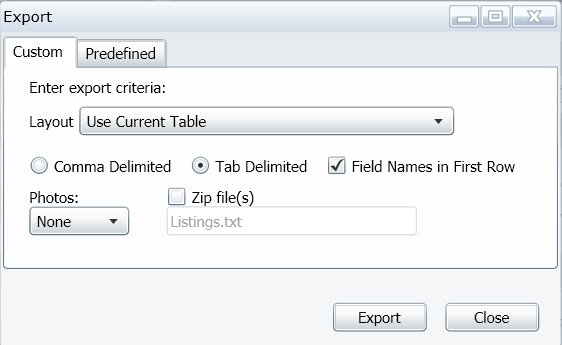
Custom
defined exports can be specified by selecting the Custom
tab (see image below). 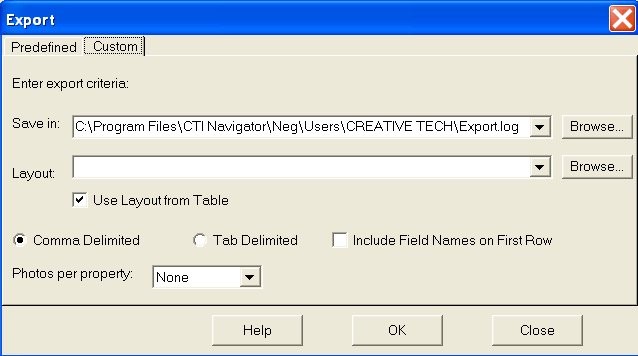
Specify the location for the export in the "Save in" box. Click on the down arrow at the end of the Save in box to select from previously entered locations. or click the Browse button to find the appropriate location.
"Use Layout from Table" is selected by default when using export from a data table. (It is not available when using export directly from a search without first displaying the data in a data table.) To use a previously saved table layout instead of the current table layout, specify the location of the layout definition file in the Layout box. Click on the down arrow at the end of the Layout box to select from previously entered locations, or click the Browse button to find the appropriate location.
Select the custom export format as either Comma Delimited (fields separated by a comma) or Tab Delimited (fields separated by a tab) by clicking on the appropriate radio button. Check the box beside "Include Field Names on First Row" to include column headings. Field names may be used by other applications such as a database program for sorting, or by a word processor in a mail merge function.
Photographs can be included in the export to the same directory as the data files. They will be in jpg format. Select the number of photos to export per property using the drop down arrow beside "Photos per property."
Click on the OK
button to process the export; or click on the Close
button to exit without exporting.
Listing data can be easily exported from either the Search Criteria or Search Results screen in CTI Navigator Web.
To export data only (without photos) from CTI Navigator Web (in Windows) to import into Excel or other spreadsheet application:
To simultaneously export data and photos from CTI Navigator Web (in Windows) to import into Excel or other spreadsheet application:
Note: Before attempting to import data in a zip file, first open it (typically by double-clicking) and then double-click on the .xls file itself. The .xls data will open in an Excel spreadsheet. (The photos will be listed separately as .jpg files and do not import with the data.)
Related articles and Internet links:
To return to CTI's menu of Help & Tutorials, click here or use the back arrow at the top of your Internet browser.
{rev.05.17.2012}