Configure or Disable AVG Firewall and Web Shield
You can click on a topic below to go directly to that section.
Whenever you
first run a program such as CTI Navigator Desktop or CTIUpdateManager over the Internet,
the subscription based (paid) AVG Firewall normally will prompt you to
select whether or not to allow
the program to access the Internet. On the confirmation screen, check "Save
my answer as a permanent rule..." (or similar wording) and then click the Allow
button. (See note 2 below regarding AVG Anti-Virus
Free edition.)
If you need
to create a Firewall Rule in your AVG security program to allow CTI Navigator
Desktop and/or CTI Update Manager
to run over the Internet, follow the instructions in
AVG’s Help
for the specific version you have installed (see Related
Articles below for AVG User Manuals); or follow the appropriate steps
summarized below.
If
you encounter a problem installing CTI Navigator
Desktop or Microsoft Silverlight, you may need to temporarily disable
some or all AVG component. Click here
for instructions to disable AVG components.
Follow the steps below to allow the CTI Navigator
Desktop application to access the Internet through
the
2016 version of
AVG Firewall:
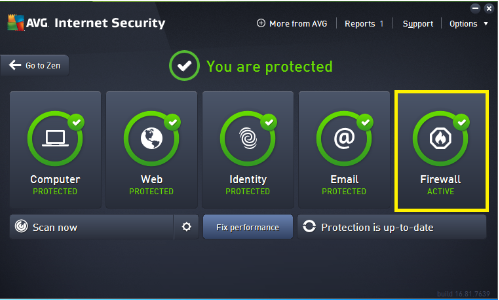
- Open AVG.
- On AVG's Main Window, click the Firewall tile.
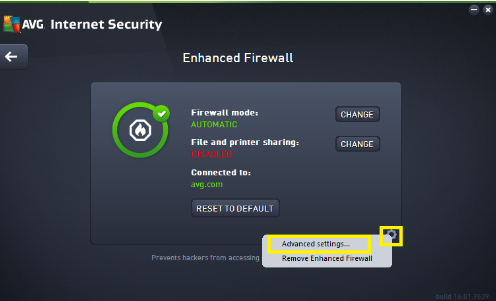
- Click the Settings icon in the bottom
right corner and select Advanced Settings.
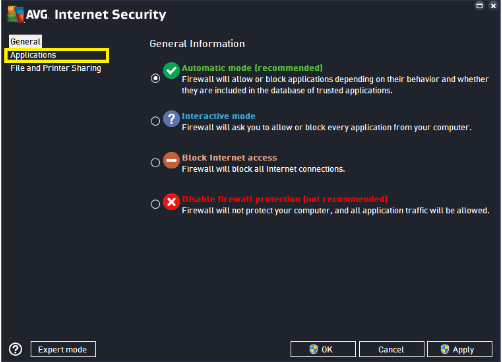
- In the left menu, click Applications.
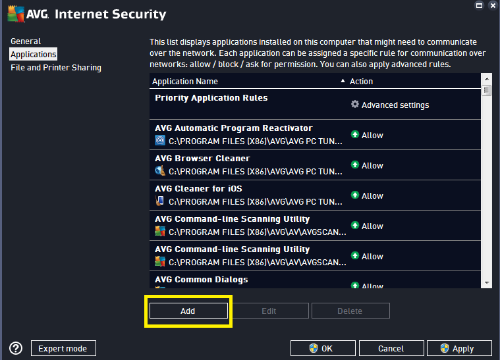
- At the bottom of the list of applications that
have tried to access the Internet:
- If CTI Navigator is not listed, click
Add button and go to step 6 below.
- If CTI Navigator is listed, click the
Edit button, change the Action to
Allow, and go to step 8 below.
- Click the 3 dots ...
next to the Path text field, browse to the
location for CTI Navigator.exe (see
program location
note below), and then click Open.
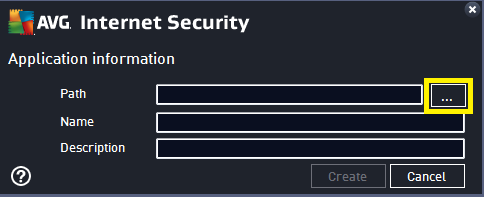
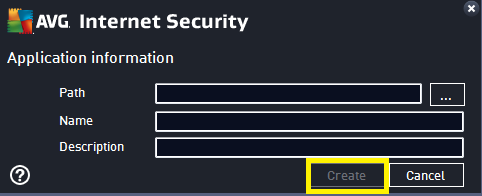
- Click Create, select
 Allow in the Application action
options, and then click OK.
Allow in the Application action
options, and then click OK.
- Click OK to close the Firewall settings
window.
- Verify that the application can connect to
the Internet now.
Program
Location Note. The default location for CTI Navigator.exe
is "C:\Program Files\CTI
Navigator\" in 32-bit versions of Windows, and "C:\Program
Files (x86)\CTI Navigator\" in 64-bit versions
of Windows.
▲ Return to Table of Contents
▲
To configure the firewall in
2011 to 2015 versions of the subscription based AVG Internet Security (see note 2
regarding AVG Free edition):
-
Open the AVG Control Center
(double-click on the AVG icon)
-
Select Tools at the
top of the Overview screen
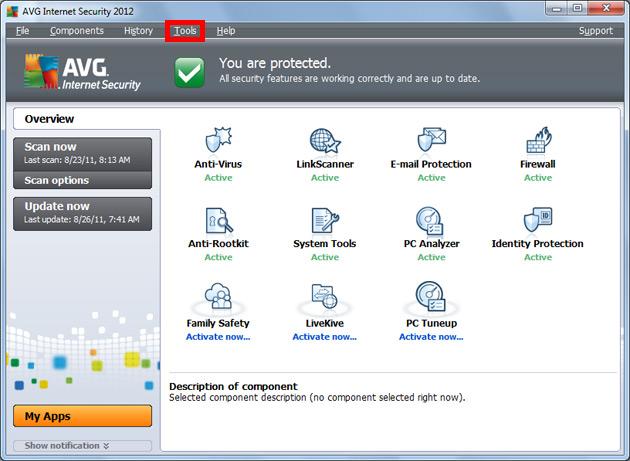
-
Click Firewall Settings
in the list
-
On the left pane, select Profiles
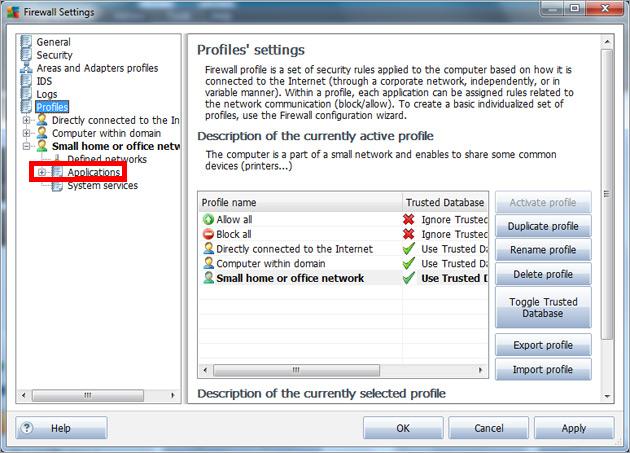
-
If it is not already open,
double-click (or click the + beside) on the Profile that describes
how your computer is connected to the Internet:
-
"Directly
connected to the Internet" is appropriate for desktop home
computers directly connected to the Internet (without going through any
hardware based security) or for notebooks connected through an unsecured
network (such as in an Internet cafe or hotel room); or
-
"Computer
within Domain" is appropriate for computers on a local
business network that is professionally administered and protected by
some network security measures; or
-
"Small home
or office Network" (or "Standalone Computer")
is most common and is appropriate for computers on a home or small
office network that may share devices such as printer or scanner, but
the network is not centrally administered.
-
Double-click (or click the + beside)
to open Applications beneath the appropriate Profile:
-
If CTI Navigator is in
the list of Applications > select CTI Navigator and go to step 7
below.
-
If CTI Navigator is not
in the list of Applications, click the Add button > browse
(...) to and select CTI
Navigator.exe (see program location
note above)
-
Under Action: select Allow for
All (do not select "Allow for Safe")
-
Click OK.
▲ Return to Table of
Contents ▲
To configure the firewall in
AVG
7.5 Internet Security:
-
Open the AVG Control Center
(double-click on the AVG icon)
-
Select Firewall in
the Component list
-
Click the Configure
button
-
Select the Applications
tab
-
Click the Add
Application button
-
Browse (click ...) to and
select C:\Program Files\CTI Navigator\CTI Navigator.exe
-
Under Action: select Allow
-
Click OK.
To configure the firewall in
AVG
7.1 AntiVirus Plus Firewall:
-
Open the AVG Control Center
(right-click on AVG tray icon and select "Launch Control
Center")
-
Select AVG Firewall
and click the Configure button
-
On the AVG Firewall
Configuration screen, select the Applications tab
-
Click the "Add
Application" button
-
Browse (click ...) to and
select C:\Program Files\CTI Navigator\CTI Navigator.exe
-
Under Action: select Allow
-
Click OK
-
Select CTI Navigator
in the Application list
-
Under "If there is
no rule for an application," confirm/select Allow
-
Click OK button.
▲
Return to Table of Contents ▲
To temporarily disable
all AVG components at once, follow these
steps:
- Right-click the AVG
icon in the system tray next to the clock.
- Click on "Temporarily disable AVG
protection".
- Choose how long you want the protection to be
disabled and whether to disable the Firewall as
well.
- Click OK.
To
disable the
Firewall component:
- Open the AVG program.
- Click the Firewall
component.
- Next to the Firewall Mode
option, click Change.
- Select the option "Disable Firewall
Protection" (or "Turn firewall protection off").
- Click OK.
To
disable the Web Shield component:
For some older AVG installations (see
note 1 below), the Web Shield feature may need to be at least
partially disabled as follows:
-
Open the AVG Control Center
(double-click on the AVG icon)
-
Select Components in
the top menu
-
Select Web Shield
-
Check Enable Web Shield
(if you want to enable Instant Messaging scanning > go to step 5;
otherwise un-check
"Enable Web Shield" to disable both IM scanning and Web Protection
> go to step 7)
-
Select Web tab
-
Under "Basic Web
Settings," un-check "Web Protection"
-
Click OK.
Note 1: You do not normally need to disable the AVG Web Shield (or Resident
Shield) unless CTI's Internet
functions are blocked (such as when "Switch to or Retry" or
"Can't connect to server" errors occur at login or
update). Before disabling a Shield, ensure that your firewall (AVG's or
Windows, whichever is active) is configured to allow CTI Navigator through.
To use the Windows Firewall instead of AVG's
firewall, see "Configure Security in Windows" in the related articles below.
▲ Return to Table of
Contents ▲
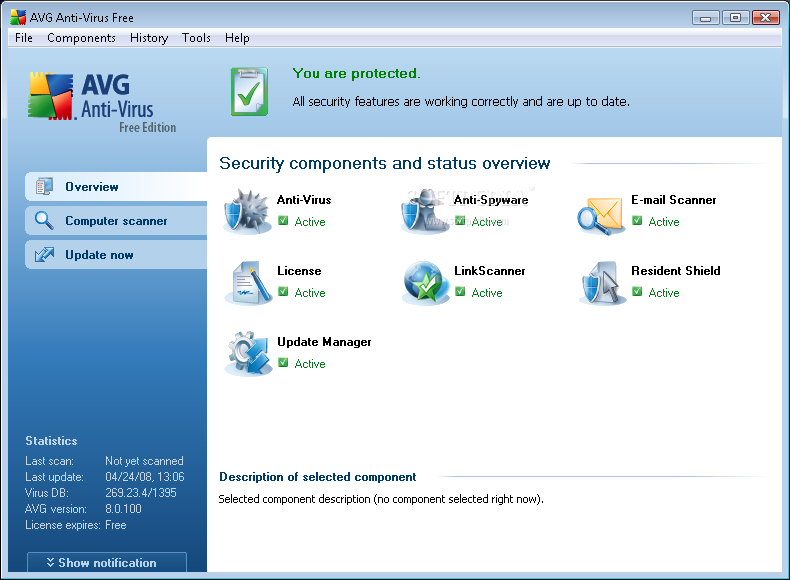
Note 2: AVG Free Edition does
not have a Firewall or Web Shield, so it does not normally interfere with
Internet access.
However, if you experience an otherwise unexplainable error e-mailing
MLS reports (see "Fix Email errors" in related
articles below) or e-mail reports are missing links (see Configure
Security in Outlook Express or Office Outlook in related
articles below), you may need to configure AVG's E-mail scanning (in
the free edition or subscription edition) so it does not scan outgoing
e-mail (see "Disable scanning of Outgoing e-mail" in related
articles below).
Note 3. Never have more than one firewall active at a time (e.g., do
not run
Windows' firewall if running AVG's firewall).
▲ Return to Table of
Contents ▲
Related articles and Internet links:
▲ Return to Table of
Contents ▲
To return to CTI's menu of Help & Tutorials, click here
or use the back arrow at the top of your Internet browser.
rev.
10.05.2016